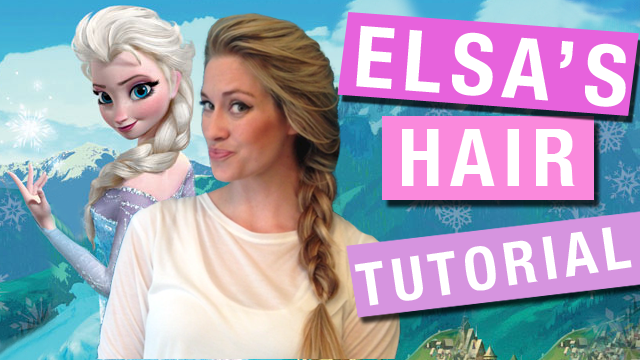
Many of us have been drooling over Elsa’s hair ever since we first saw it. It’s a classy, loose braid that is actually pretty easy to recreate in real life. The creators of Frozen actually brought in a famous hair designer to help design Elsa’s now famous braid hairdo.
Follow the steps in this hair tutorial and within 10 minutes, you’ll be rocking Elsa’s braid just like the Snow Queen herself. For a video tutorial of Elsa’s braid, click here or scroll down to the bottom of this post.
Materials:
- Fine-tooth comb
- Clear hair tie
- Curling iron
- Hair spray
- Hair
- Bobby pins (optional)
- Little blue ribbon/bow (optional)
- Clip-in hair extensions (if needed)
Prep
Braids usually hold best when the hair is a little “dirty”, meaning it hasn’t been recently washed. Freshly washed and dried hair is smooth and slick, making it harder for the braid to hold in place. For best results, do this look on two- or three-day hair.
This hair style works best for people with long hair since Elsa has very long hair herself. However, if you have medium-length hair you can still achieve this look with clip-in hair extensions. These are sections of hair that can be clipped into the bottom of your hair. As long as you match the color, they are pretty convincing and look real. Take two of these sections and clip them in, which will give you the length and fullness you need to complete this look. To browse hair extensions on Amazon, click here.
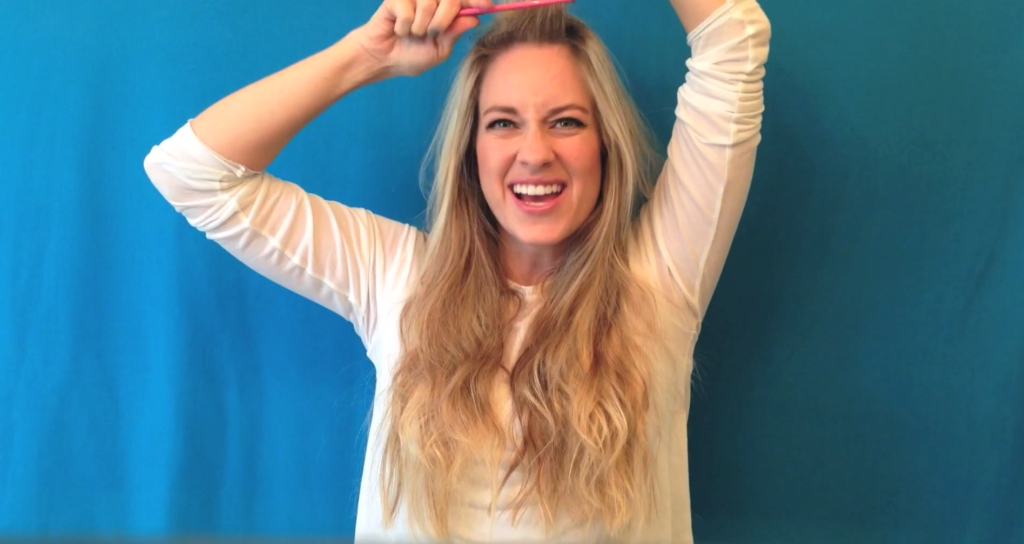
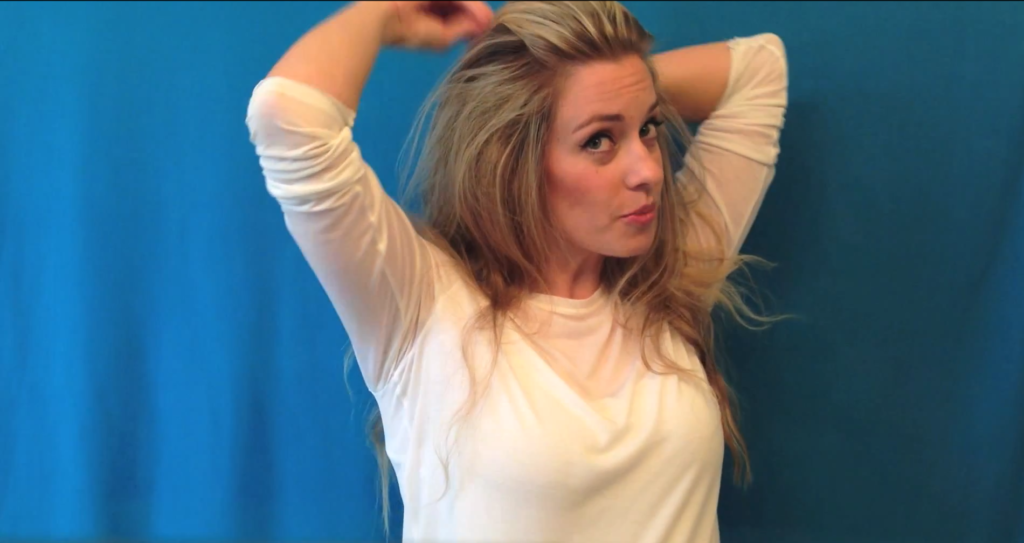
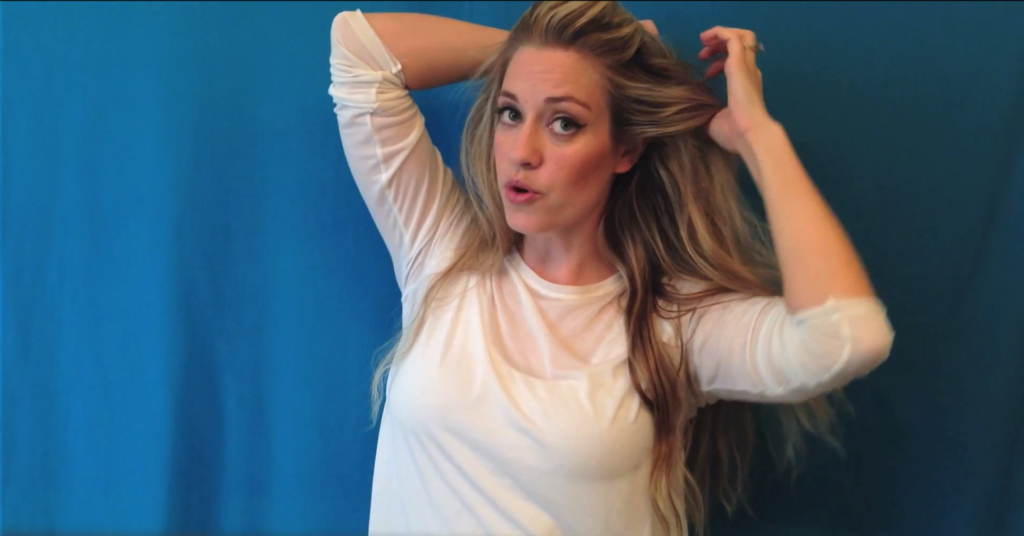
Step 1: Volumize
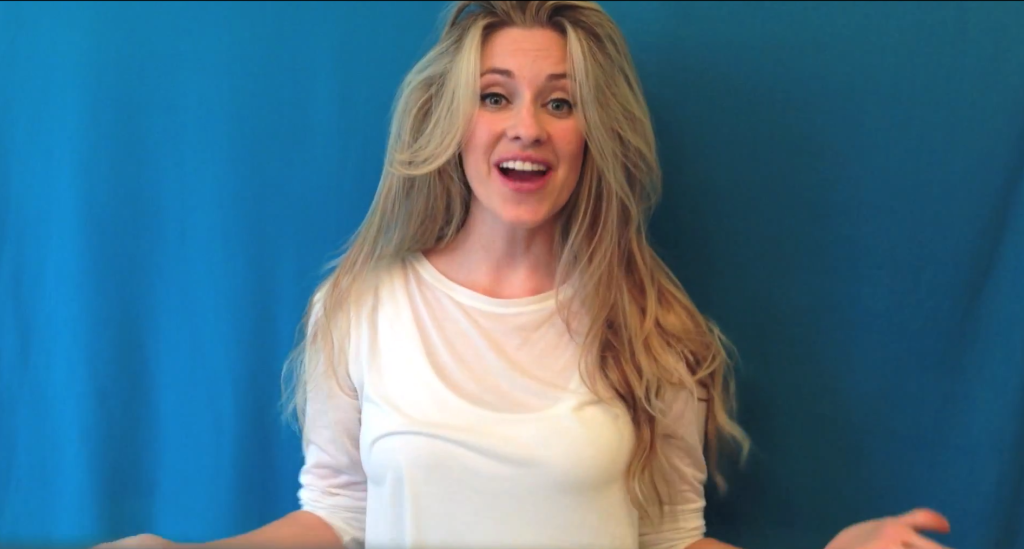
Elsa is a cartoon character, so no wonder her hair looks larger than life. We need to volumize and tease the hair so that it has that cartoon volume. Divide the hair into 3 sections (top and sides). Start with the top section and divide that section into small pieces that are parallel to your forehead. Take a fine-tooth comb and tease the hair on the backside of the section (the part facing away from your face). Once you have teased the hair, lightly comb through the front of the section so that all the little fuzzy hairs are smoothed out from the front. Repeat this for all of the smaller sections behind. Then repeat again for the two side sections.
Step 2: Braid
After your hair is big and volumized, you are ready to braid. That those three sections and use those as your starting place for the french braid. Make sure you don’t braid too high on the top of your head. Elsa’s braid starts on the upper back of her head. While braiding, make sure to add big chunky sections of hair and to braid loosely.
Once you braid down to the nape of your neck, continue braiding but make sure this section is braided loosely down one side (so it drapes over the front of your shoulder). After you fold a piece over, jiggle the braid a bit to loosen it up. Continue this process until you braid to the bottom of your hair. Take a clear hair tie to secure the braid in place.
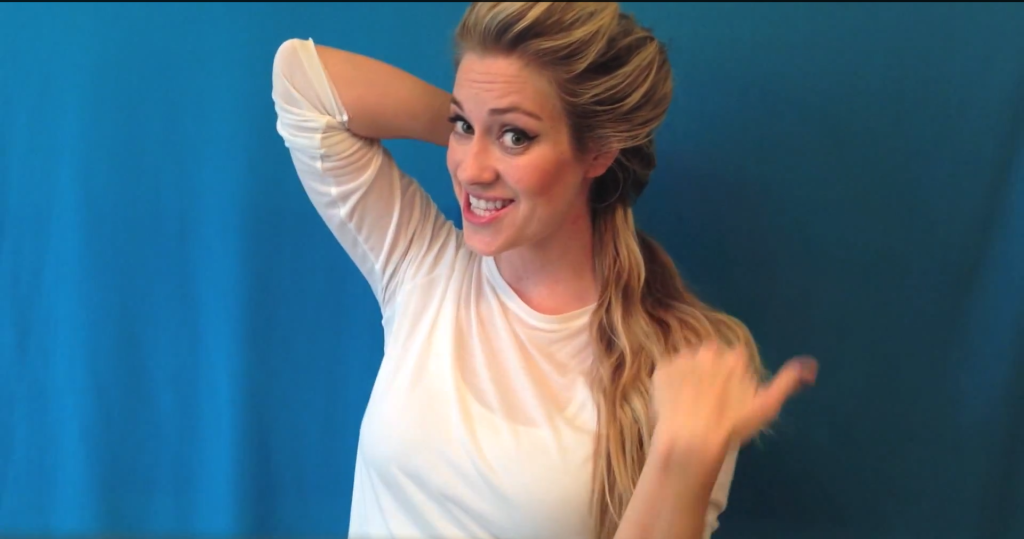
To make the braid look even fuller, pull at the sides of the braid. Start at the braid on the nape of your neck, then take the two side parts of the braid and carefully pull them so that the braid slightly expands. Continue this all the way down to the bottom of the braid.
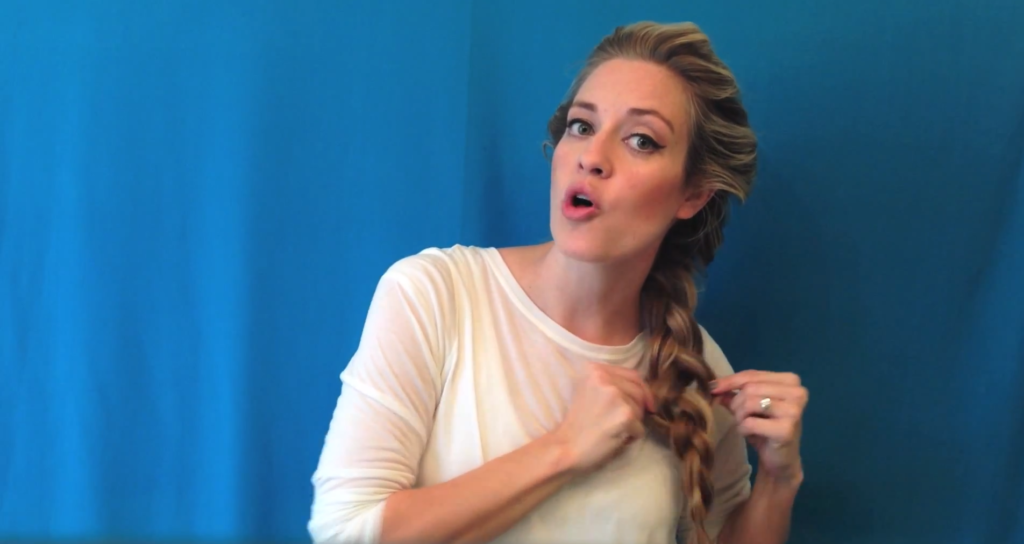
Step 3: Wisps
Elsa has bangs that are wisped back when she wears her hair in this braid. If you don’t have bangs, then stop the tutorial here and you’re done! But if you do have bangs or shorter pieces of hair that frame your face, we’re not quite finished yet.
With your fingers, carefully pull out shorter pieces of hair around your face. Don’t go too far back or too far down (close to your ears). Keep pulling out pieces until you have a good amount.
(Optional) Instead of pulling these pieces out after having braided them, you can start with them already out of the braid. To do this, just pull out the pieces you want, then braid the hair without these pieces.
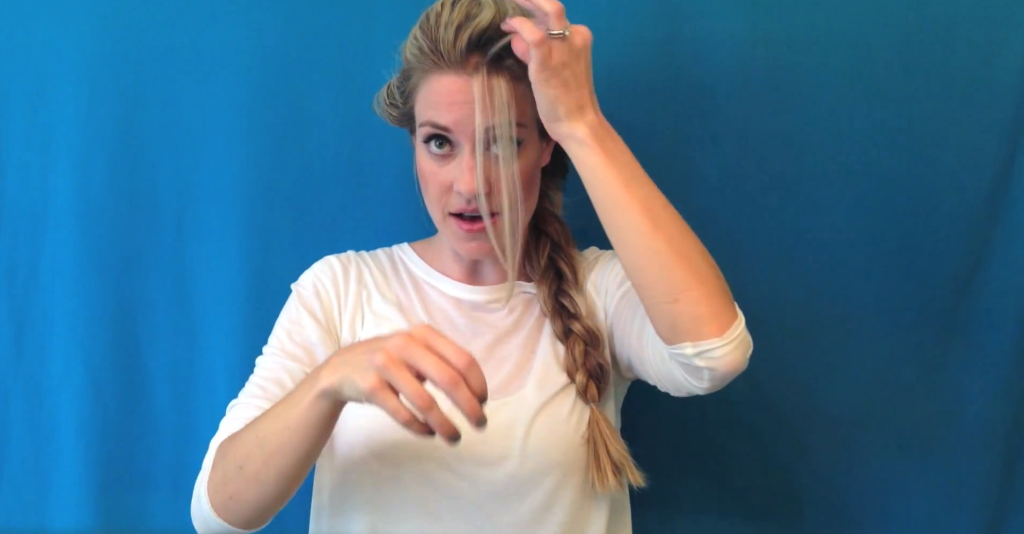
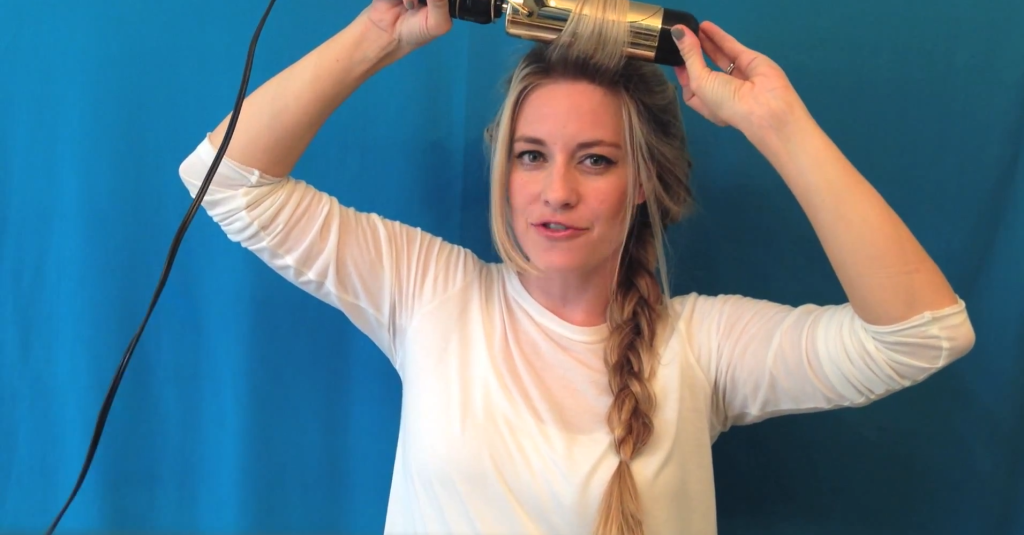
Step 4: Curl
Before we can wisp these pieces back, we have to curl them. Take a curling iron (any size from 1-3 inches works) and loosely curl the ends of these pieces. Nothing fancy here. We’re just making sure the ends have a nice curl for when they are wisped back.
Step 5: Style
Now with your hands, style these pieces back in place. The majority of these pieces should be placed on the top and upper sides of the head. Keep styling until you have them arranged as you like. Then take hair spray and spray those babies into place. After that, you’re done!
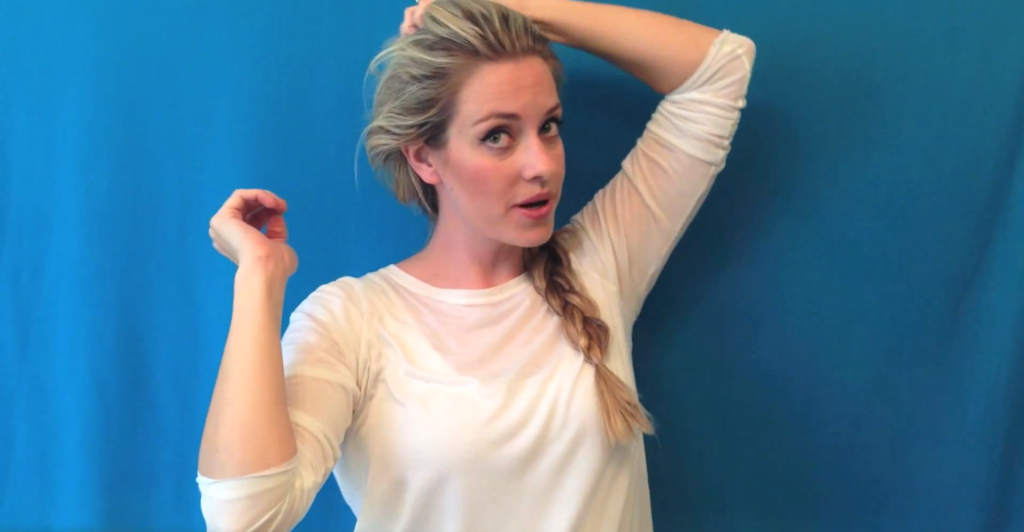
Now, since these pieces are just hair sprayed into place, they might eventually fall out of place since this hairstyle is so loose. If this happens, you can use bobby pins to secure the pieces back in place so they don’t move during the day.
Step 6: Accessorize (Optional)
If you want to take this hairdo to the next level, you can accessorize the way Elsa does. If you look really closely, Elsa has a really tiny blue bow at the end of her braid. Also, in some pictures she has ice crystallizations to decorate her hair.
Final Thoughts
Since Elsa’s braid has such a loose look, it is likely that the braid may come out halfway into the day. Just re-braid, style the wispy pieces back and hair spray. Or take bobby pins to hold the braid and wispy pieces into place.
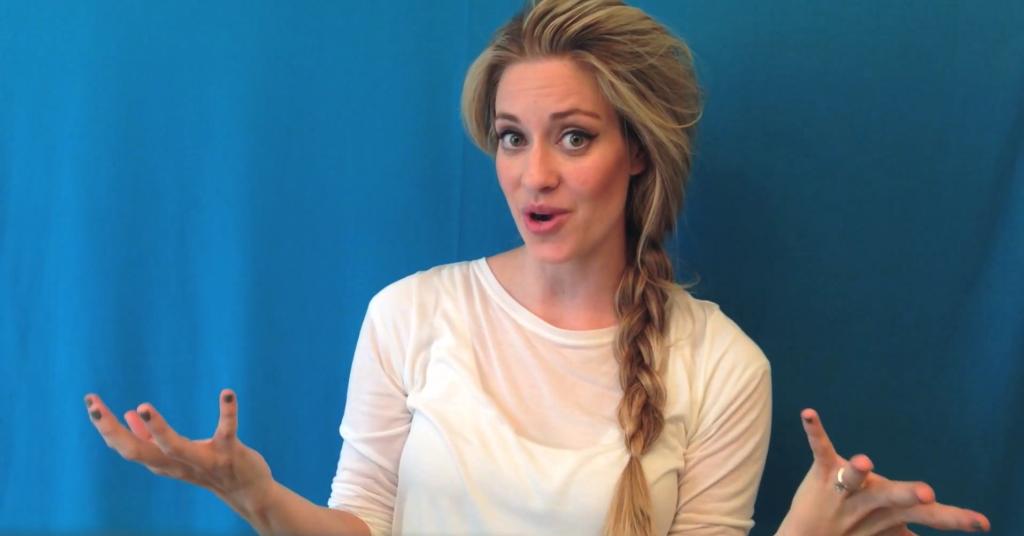
The whole look should take less than 10 minutes. It’s actually pretty easy and looks great in person. The volumizing doesn’t look weird or fake, but actually makes it look awesome in person. I’ve worn this braid a few times and every time, I get a lot of compliments on it with people saying how much they love how full it is.
Hope you guys liked this Elsa braid tutorial! Happy styling!
